Reverse Engineering My Own App from Compiled AWS Code
I accidentally deleted my local Email Bits repo and had no remote backup. Here's how I recovered the entire codebase from compiled Lambda functions and minified S3 assets.
It had been awhile since I refreshed my personal site (screenshot above - circa 2019). Seeing that I’ve been itching to write more code outside of my day-job, I figured I could put to the test how quickly I could build + deploy a static website from start to finish. I had previously used the same system / set of processes to build & deploy Cabeça de Queijo and Toucan Trips.
Honestly, getting Name.com DNS + AWS setup properly to host the site too ~60 minutes - max. Since I had worked out the kinks in the process w/ Cabeça de Queijo this was relatively painless with only one hiccup (setting up a 404 page in CloudFront and in the codebase).
 Immediately after code is merged into the
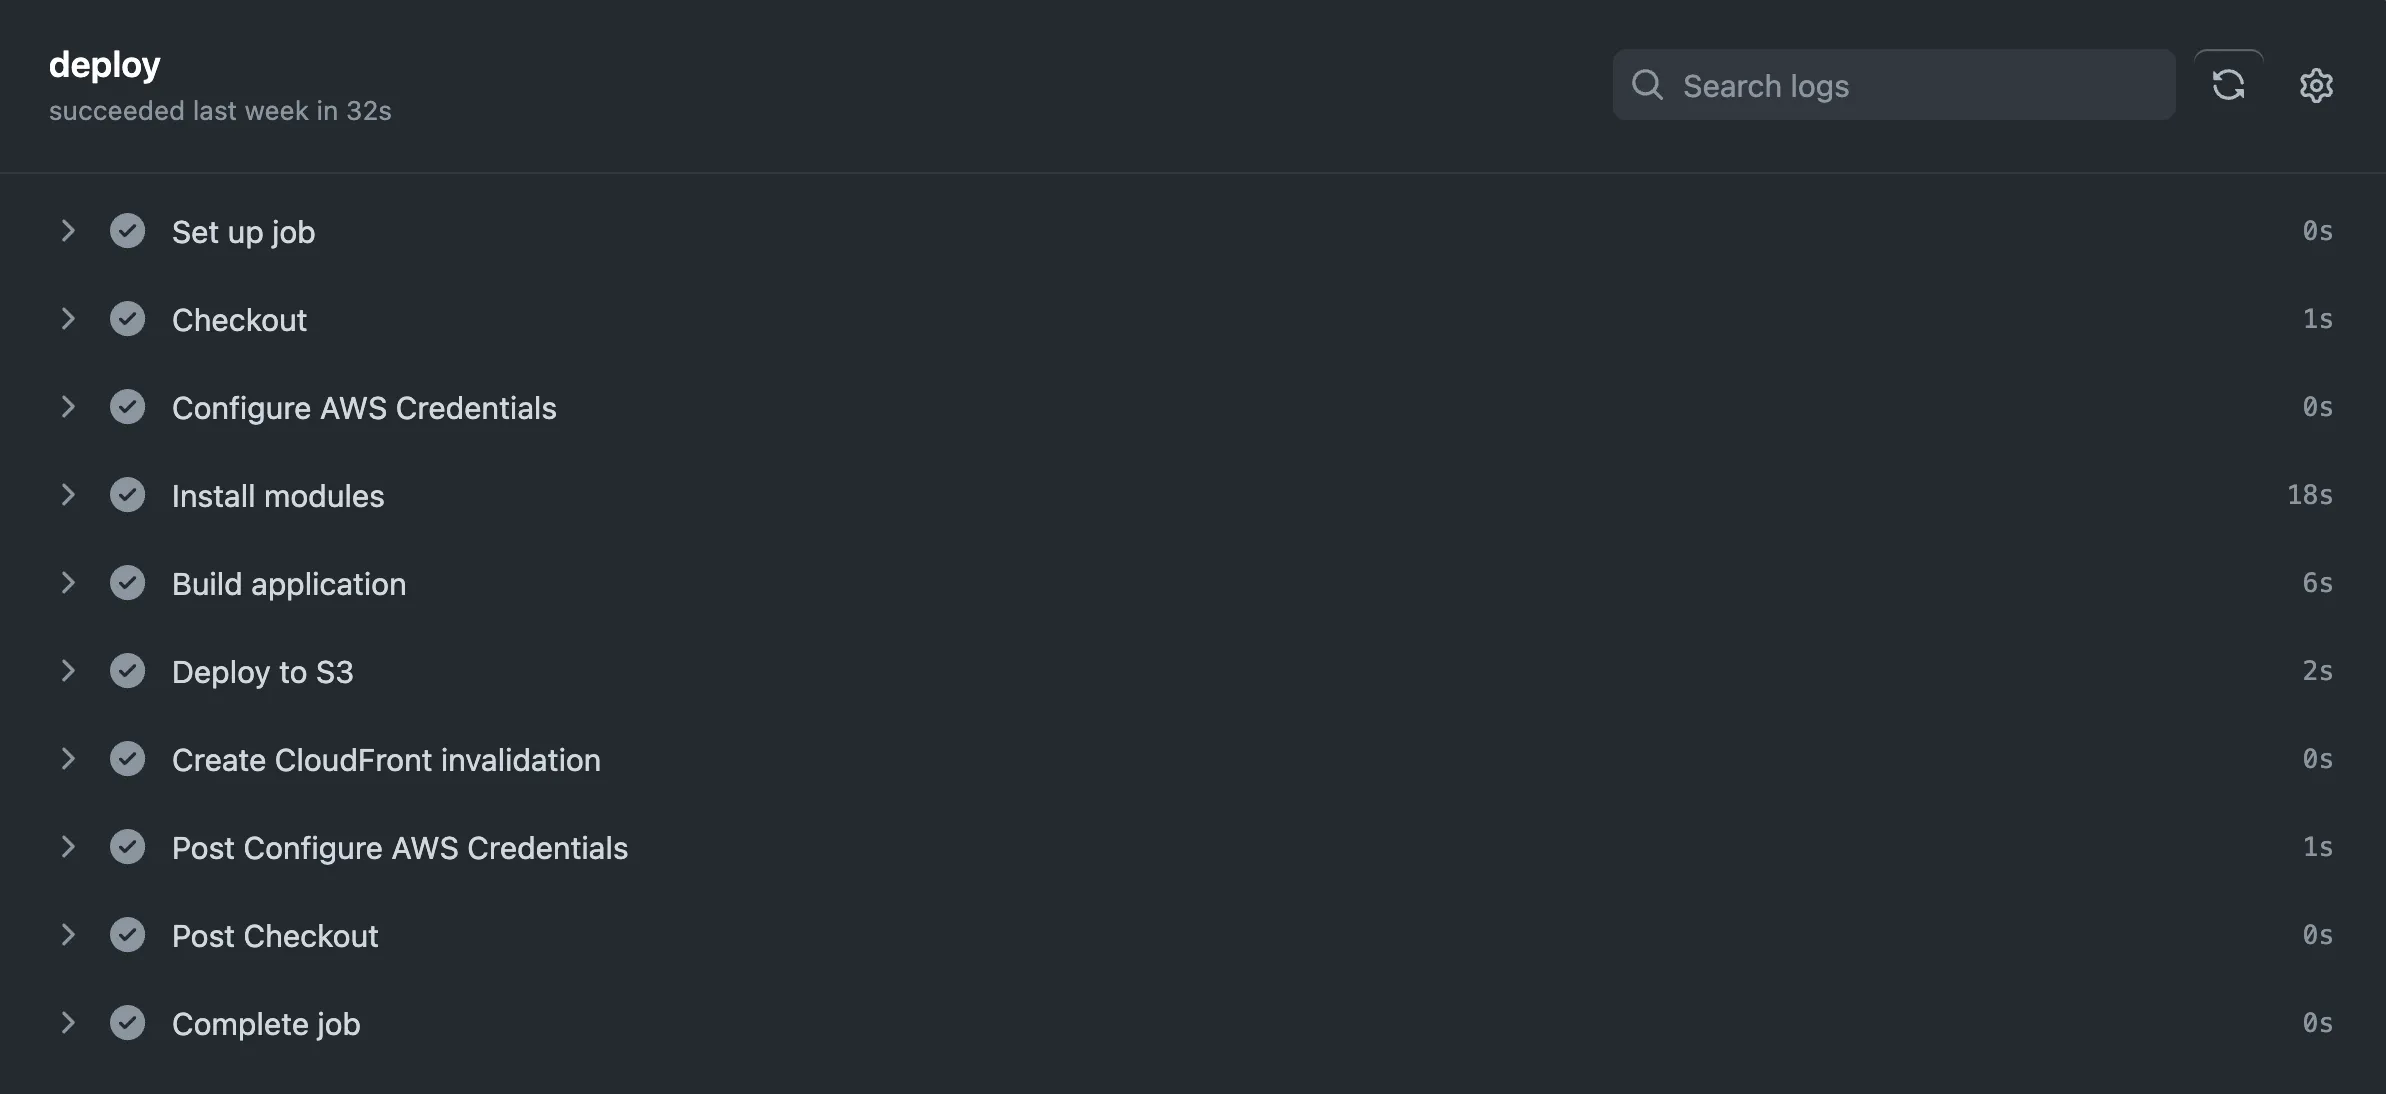
 main branch, the GitHub Action to deploy the site is kicked off.
In total, it takes whopping 41 seconds - of which GitHub Actions adds 10s and installing npm modules is 18s. You can see that by having specific steps in your GitHub Action, you can really nail down what is taking up time.
Certainly, as with most technology, there are limitations to what this deployment system can / cannot do. This guide is geared around launching an Astro website. And even tho Astro is relatively new, I found their documentation to be fantastic - as well as the various examples that folks in the ecosystem have produced.
*.domainName.com && www.domainName.com and with the standard DNS Validation and RSA-2048 Key Algorithm.Static Website Hosting disabledAll Edge Locations, HTTP/2, HTTP/1.1, HTTP/1.0, be connected to the SSL Certificate that was created earlier (pickable in a dropdown option), TLSv1.2_2021 security option, Redirect HTTP to HTTPS, and other setting for the index page and error pages.Origins tab and select the only entry + Edit. From here, you will setup Origin access control settings (recommended) and then Create control setting and then Save to create a linkage between CloudFront and the S3 Bucket.merged or pushed to the main branch. Step 14 is where the various Secrets -name: Deploy Website to Amazon S3
on:
push:
branches:
- main
jobs:
deploy:
runs-on: ubuntu-latest
steps:
- name: Checkout
uses: actions/checkout@v3
- name: Configure AWS Credentials
uses: aws-actions/configure-aws-credentials@v1
with:
aws-access-key-id: ${{ secrets.AWS_ACCESS_KEY_ID }}
aws-secret-access-key: ${{ secrets.AWS_SECRET_ACCESS_KEY }}
aws-region: us-east-1
- name: Install modules
run: npm ci
- name: Build application
run: npm run build
- name: Deploy to S3
run: aws s3 sync --delete ./dist/ s3://${{ secrets.BUCKET_ID }}
- name: Create CloudFront invalidation
run: aws cloudfront create-invalidation --distribution-id ${{ secrets.DISTRIBUTION_ID }} --paths "/*"
.github/workflows/deploy.yml file above, you need a few secrets stored in GitHub.com on the repository. You can access this Secret Store under the Settings tab of your repo. (NOTE - In the deploy.yml file above, the BUCKET_ID is just the plain-text name of your bucket - project-name-frontend){
"Version": "2012-10-17",
"Statement": [
{
"Sid": "VisualEditor0",
"Effect": "Allow",
"Action": [
"s3:PutObject",
"s3:ListBucket",
"s3:DeleteObject",
"cloudfront:CreateInvalidation"
],
"Resource": [
"arn:aws:cloudfront::177283549651:distribution/[GET_THE_CLOUDFRONT_DISTRIBUTION_FROM_THE_MAIN_PAGE]",
"arn:aws:s3:::[S3_BUCKET_NAME]*",
"arn:aws:s3:::[S#_BUCKET_NAME]"
]
}
]
}
Security Credentials tab to create a new Access Key.BUCKET_ID & DISTRIBUTION_ID) into GitHub.com Secret Store.*.domainName.com & www.domainName.com.domainName.com and create both A and AAAA records for both *.domainName.com and www.domainName.com (in total, 4 new records). You will do Simple Routing and Alias to CloudFront Distribution and select your new CloudFront Distribution in the typeahead/dropdown.Hosted Zone Details pane into Name.com.[ns1-ns4].name.com name server records
*@domainName.com to your personal email@provider.com, utilize a tool like improvMX.com. It takes ~5 minutes to setup and you can even send emails from *@gmail.com but make them look like their from *@domainName.com.If there are issues with the above, ensure that your DNS has propagated with a tool like this.
Note - If you have a multipage website, be sure to create a CloudFront Functionhttps://us-east-1.console.aws.amazon.com/cloudfront/v3/home?region=us-east-1#/functions) in order to handle redirects properly.